
Apsona’s document merge tool includes a feature for generating address labels via a suitably-structured .docx template. With this feature, you can (for example) create a report containing the contacts to whom to send thank-you letters, and generate both the thank-you letters and the address labels from that report, using two different merge actions.
Features #
- You can generate address labels from any object, such as Lead, Account or Contact, or any other native or custom object.
- You can also generate them from any Apsona report or Multi-step Report.
- You can start with almost any standard address label template as a template and tweak it to suit your needs, or create your own.
- You can include barcodes for zip codes using suitable barcode fonts. There are numerous such fonts available on the web.
The address label generator is useful in many situations, such as for generating
- Mailing address labels
- Name tags for gatherings and events
- Packing slip labels
- Admission tickets at events
- Food supply service labels
About address label templates #
For the purposes of this tool, an address label template is just a .docx file containing a table and place-holder merge fields. You can start, for example, with any of the family of Avery Label Templates. If you start with an Avery or other canned template, the file will already have a table in it, and you just need to fill in the cells with the address fields as described below. You can also create your own label template with any logos, colors or font styles you need. If you are creating a new template other than a canned template, you will need to create a suitable table as described by the requirements below. In either case, you might find it useful to look at our macro for creating merge fields.
Requirements #
The only requirements imposed on the template are the following.
- There should be a table in the template file, with at least two columns and two rows, representing the cells into which the labels will be generated.
- The top row of the table must contain the template merge fields, laid out in the format you want. The document generator will use this row as a “prototype” row to be filled with addresses and replicated as many times as necessary.
- In the top row, you can select one or more cells to contain addresses, and others to be empty, or contain logo images, or spacers, or whatever. Some examples:
- You might use all the cells as address cells, without any spacers or logo images, as in the example below.
- You might have narrow “spacer” cells between the address cells.
- You might alternate cells containing addresses with cells containing logo images.
The only requirement is that every cell that you wish to contain an address must have the same content, specifically, the same merge field names.
An example #
Here is an example showing the steps to generate address labels from the Contact object. We will use the sample template file available here.
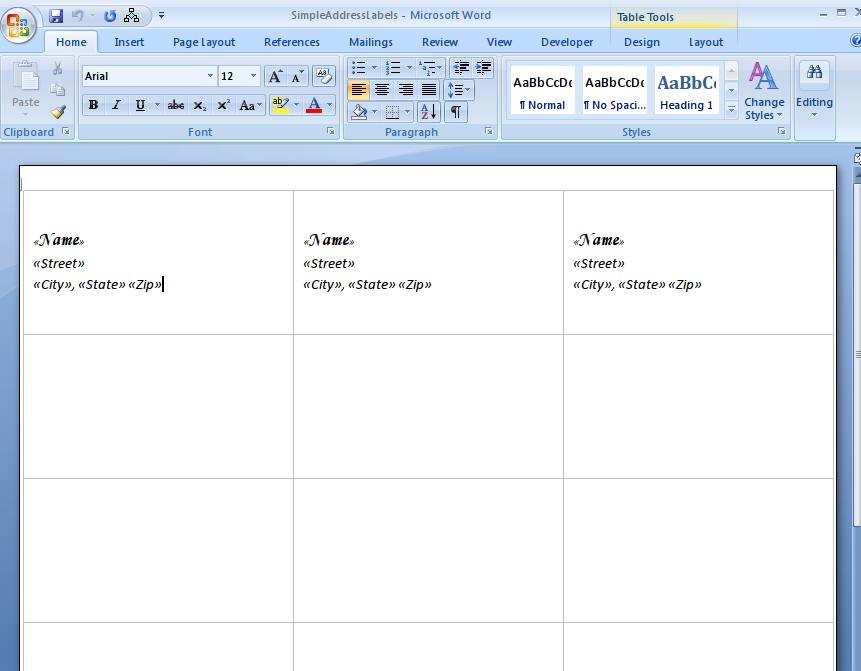
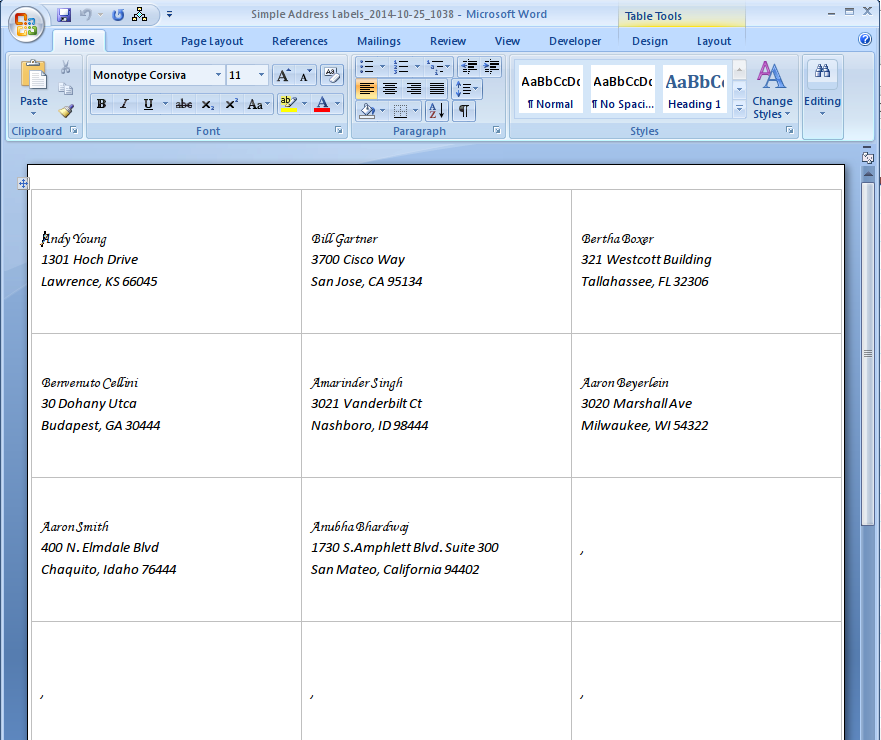
- Create the necessary Word template, and upload it to your Documents object in Salesforce. Below is a screen shot of the one we use in this example. Notice that the three address cells in the top row look identical, as specified in the requirements above. Notice also that there is a bit of styling, with different fonts and sizes for the Name and Address parts.
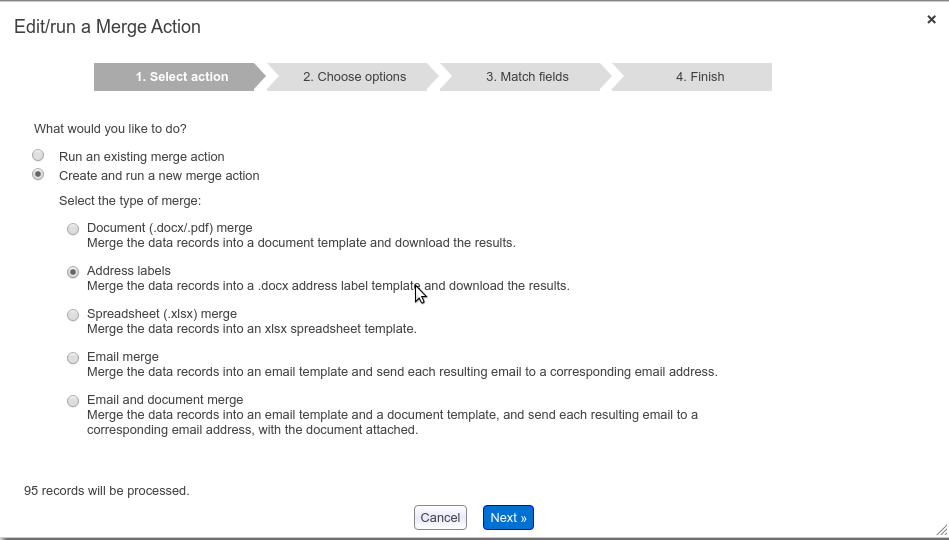
- Filter your data to produce the necessary Contact records, and click Tools – Merge/Mail to start up the merge tool. Select “Create and run a new merge action” and click the “Address labels” button. Then click “Next”.
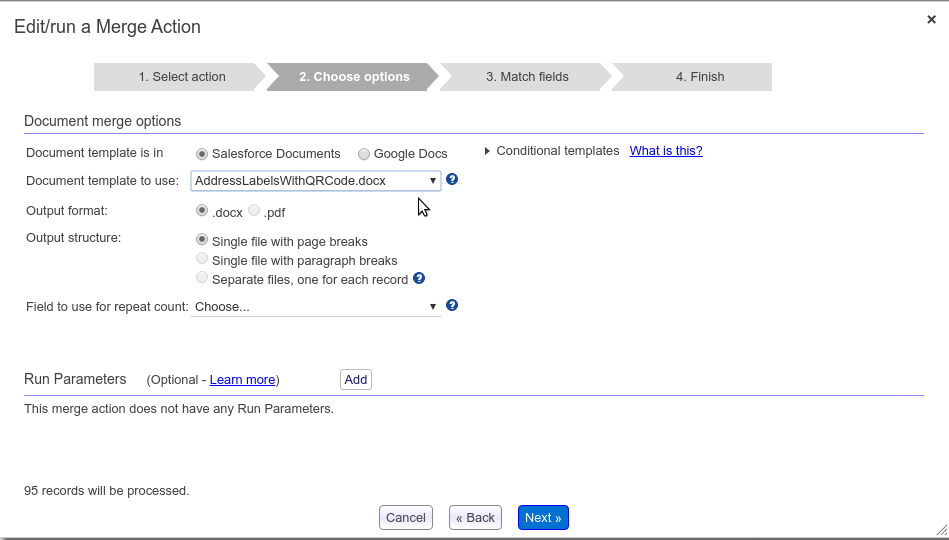
- Select the template you have created. Notice that in this step you can only generate a single
.docx file. Click “Next”.
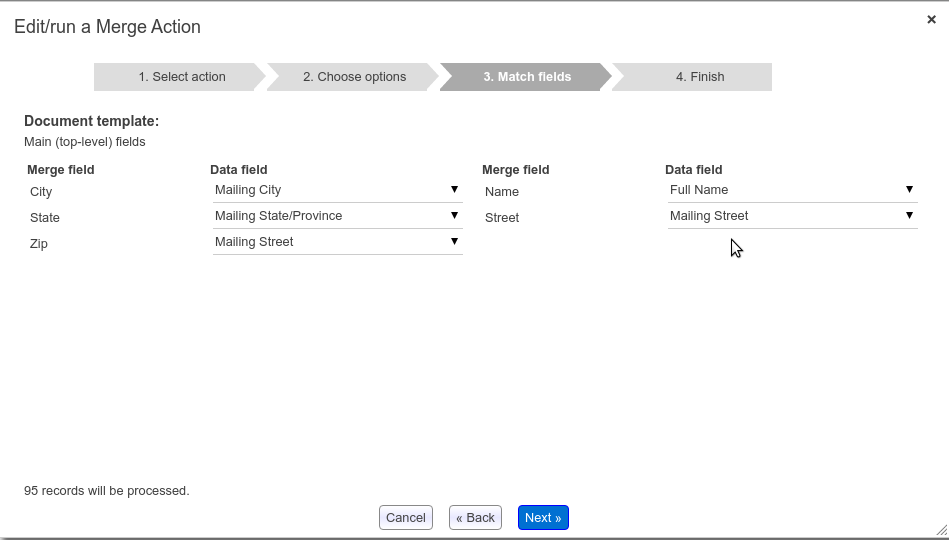
- Set up the mapping of the merge fields in the template to the data fields from your data source. In this example, we are merging data from the Contact object. Click “Next”.
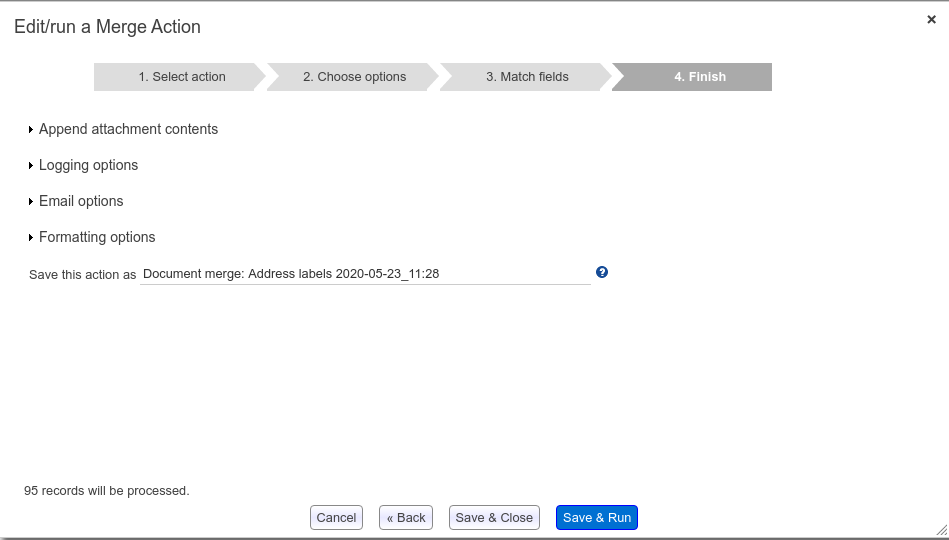
- In the “Save this action as” box, provide a name for your new merge action. Click “Finish”. When the “Download results” link appears, click it and dowload the results.
- Below is a screen shot of the resulting
.docxfile in our example.
Additional features #
The address label generator includes most of the features you might need for common use cases.
Conditionals #
You can include IF-THEN-ELSE conditionals along the lines descibed in this article. This can be useful, for example, when you are generating a list of contacts for your field service personnel, and you wish to conditionally include or exclude some contact fields based on other fields or data.
Sublists #
You can include sublists of data, as described in this article. As an example use case, suppose you wish to generate name tags for your guests at an upcoming gala, and you wish to include the names of the guest’s accompanying team or family members on the name tag. You can then create a sublist report for the team members, display them on the name tag.
Repeat counts #
Ordinarily, we need just one address label per record in the report or object data source. But sometimes you might need a variable number of address labels per record depending on the data in the record. For example, suppose you are generating food item labels from a “Food Item” object, and you want as many labels as the number of “Servings” which is a field in that object. So if you have a Food Item record with a value 3 in its Servings field, you need 3 identical labels for that record.
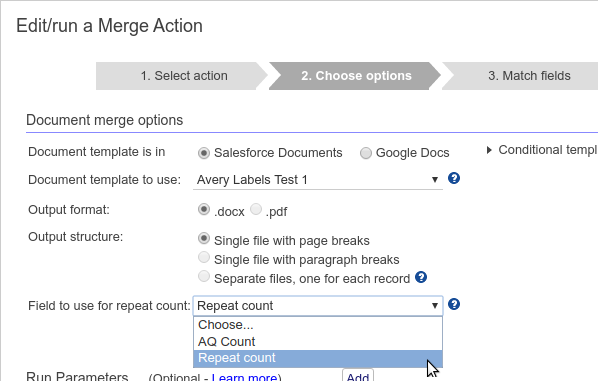
The Address Label Generator includes a feature for such a situation. You can specify a data source field in the “Field to use for repeat count” selector in step 2 of the merge action builder – see screenshot below. The value in that field determines the number of copies
Some notes:
- The field selector shows only the numeric fields in the data source, regardless of whether the data source is an object, a report, or a multi-step report.
- From a report data source, you can create a calculated value field which produces numbers, and you can then use that field to control the repeat count.
- If you do not choose a field in the selector, it defaults to generating one label per record.
- The generator will produce at least one address label per record, even if the value in the field is zero or negative.
- The generator will produce no more than 500 copies of an address label per record, even if the field value is larger than 500. This is a safeguard against accidentally producing too many copies and choking the generator.
Troubleshooting #
The most common cause of errors in address label generation is disparities between the “prototype” content in the first row of the table template. So if you see invalid content being generated, or some columns being empty, the first step is to ensure that any “content” columns in the first row – i.e., columns containing template fields – have the exact same content. You can ensure this by copying the content of the first column and pasting it into the other columns in which you want address labels to appear.