With a “mass update” or “bulk update,” you use just one step to update one or more fields in a large number of records, instead of the tedious and error-prone process of updating each record individually. Here are a few common use cases.

- You want to reassign the ownership of a large number of records, by updating the Owner field of those records.
- You have identified all the leads with whom you communicated in the last several days, and you wish to change the status of all of their records from “Open” to “Contacted.”
- You added a new custom field to one of your objects, and you wish to copy into the new field the value of an existing field.
- You wish to set the value of one of the fields of an object based on a calculated formula using other fields in that object.
Apsona for Salesforce enables you to perform each of these operations in a few clicks. The first two examples above are cases in which all the updated fields in all the selected records have the same value. E.g., in example 1 above, the Owner field receives the same value in all the records. We call these updates with a literal value. The second two are cases where the value of the field in a record is computed from values of that field (and perhaps other fields) in the same record, and these are called updates with expressions.
A third possibility for mass update is where there is no direct relationship between the new value and the record; for example, you might be given a list of product names and their new prices, and you wish to update the prices in your database. This case is handled using Apsona’s
update-via-import feature.
Summary of steps for mass update #
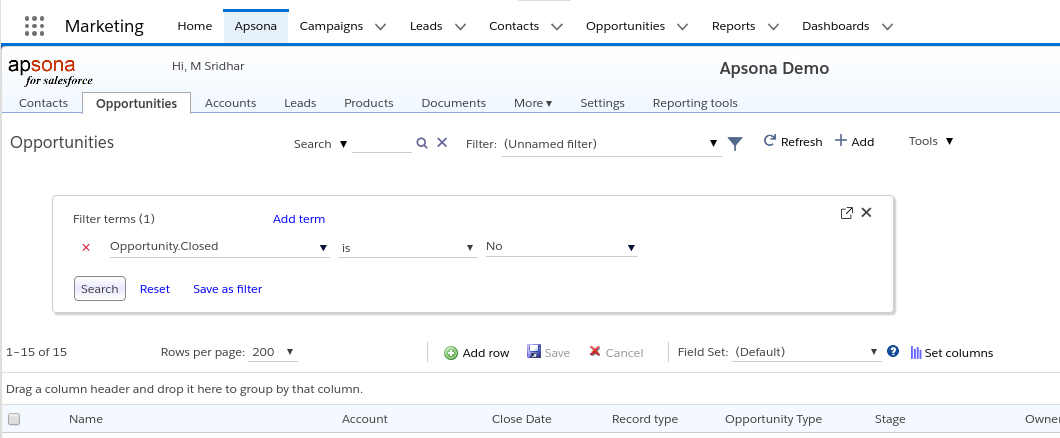
- The mass update feature requires you to first identify the set of records to be updated, via a search operation. (See the search documentation for details on searching and filtering.)
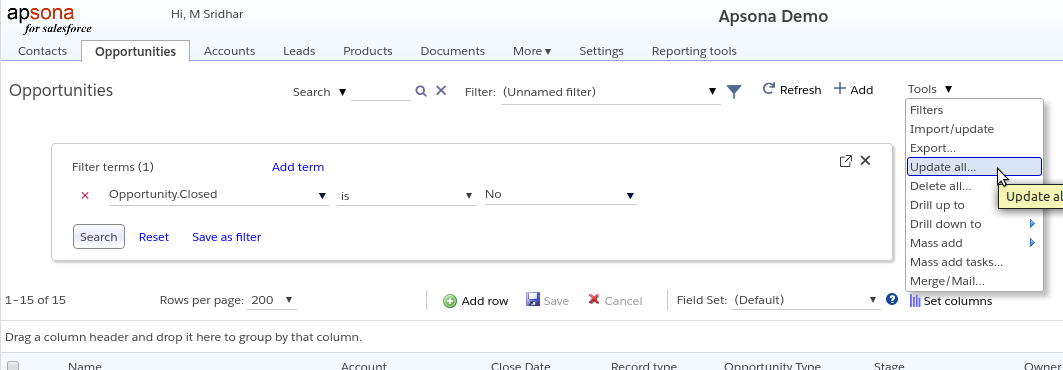
- Once you have filtered your records, you click the “Update all…” menu item in the Tools menu on the right. If you wish to update just a small selection from among the search results, you can use the checkboxes at the left in either the console view or the tabular view to select the ones you wish to update. In this case, the menu item in the Tools menu will show as “Update checked..”. Clicking the menu item displays a popup window.
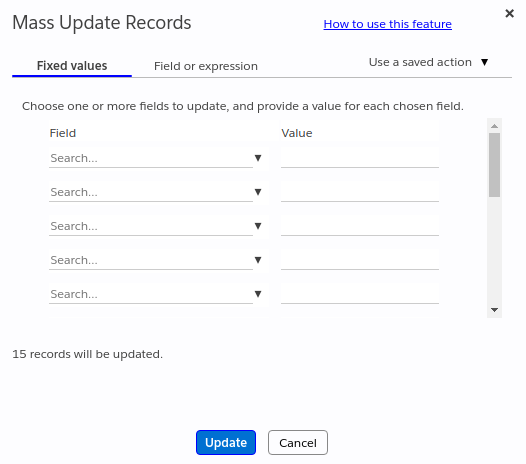
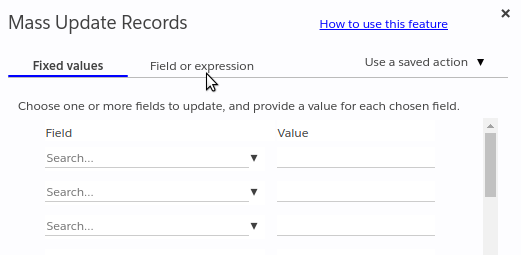
- If you are performing a literal update, choose the field you want to update, and provide a value for it. If you wish to perform an update with an expression, select the “Field / expression” tab at the top of the popup, and specify the field or the expression to use, as described below.
- Click the “Update” button, and all the records in the current search will be updated.
Note that if you use “Update all”, all records in the filter will be updated, even if they span multiple pages in your display. For example, your search might have produced 5,000 records, only 50 of which are shown on the page. When you click the “Update” button in the popup, all 5,000 records will be updated. If you use “Update checked”, however, only the ones you checked will be updated.
Examples #
Here are a few examples of how to accomplish some specific mass-update tasks.
Example 1: Change ownership #
Let’s say we want to change the Owner of a large number of Opportunity records.
- Find the Opportunity records for which you wish to change ownership. You can use Apsona’s search feature for this purpose.
- Click the Tools button on the right, and then click the “Update all…” menu item. (Note that this menu item is visible only if your system administrator has allowed you access to it. See the access rights documentation for details on how to configure this item.)
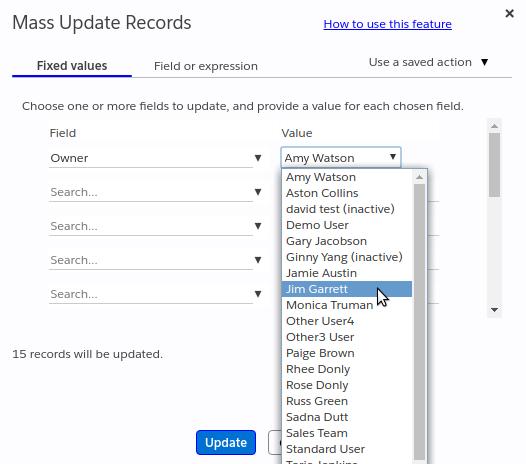
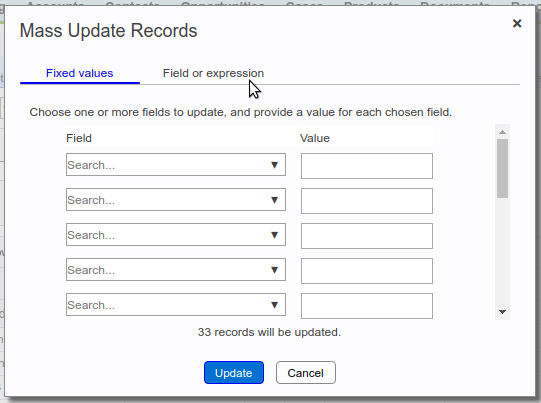
- The “Update records” popup window appears. This window lets you choose up to 15 fields whose values you can update.
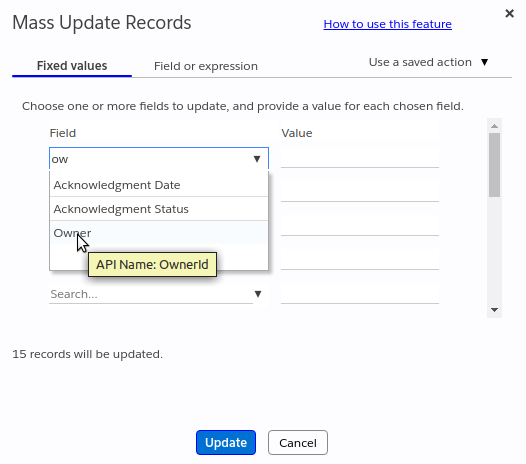
- Choose the “Owner” field. You can use the search box at the top of each dropdown to quickly find the field you want. When you hover your mouse over a field, the tooltip displays the API name of the field, to help you ensure that the correct field is selected.
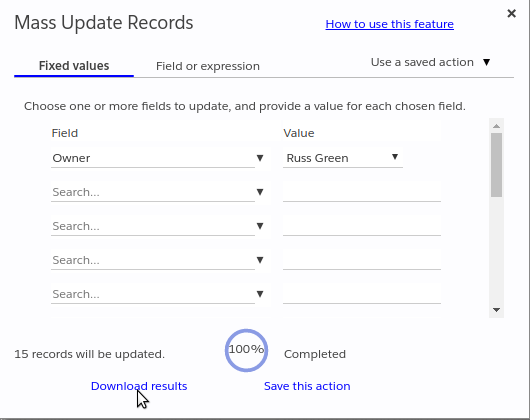
- Choosing that field causes the corresponding “Value” to show a dropdown containing the names of the active users in your system. Choose the user who should be the owner of the filtered records, and click the “Update” button.
- This will update all the selected records, and then allow you to download a CSV file containing the old and new values of the fields you updated.
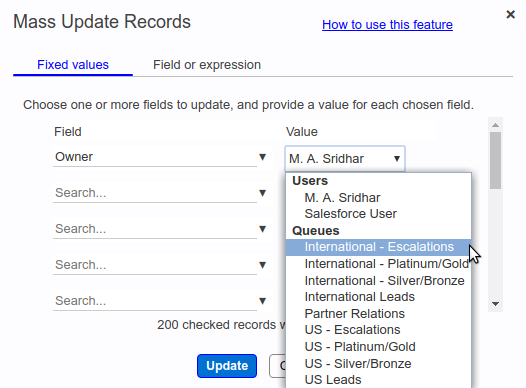
Assigning ownership to Queues #
If you invoke the Mass Update popup from within the Lead object or the Case object, and select the Owner field, the available choices will include Users as well as Queues (see screen shot below). This lets you reassign a bunch of Lead or Case records to a particular Queue. (Note that Queues will only appear in console or tabular views of the Lead and Case objects.)
Example 2: Copying field values #
Sometimes we wish to temporarily copy field values from an existing field to a new field. To achieve this:
- Find the records in which you wish to make this change, using any of the search mechanisms or by using checkboxes, as in the other cases described above.
- Click the “Update all” menu item under Tools.
- In the popup that appears, click the “Field or expression” tab.
- The popup now lets you choose a target field (into which the data should be copied) and a source from which the data should be copied. Choose these two fields as needed.
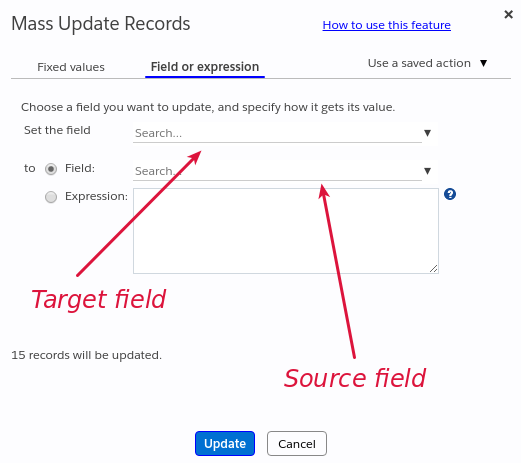
- Click the “Update” button.
Example 3: Set field value using a formula #
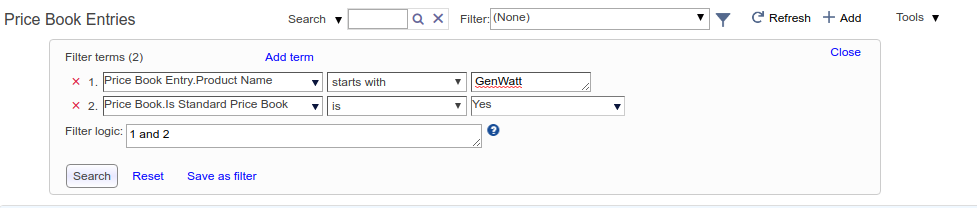
Suppose we wish to increase the prices of all the GenWatt products in our standard price books by 4%. This is an example where the new value of the Price field is not the same for all the records being updated, but is calculated using existing values in the record.
- Find the Product records that you wish to update, using the search features. Alternatively, select the ones you wish to update using the checkboxes to the left of the records.
- In the popup that appears, click the “Use field/expression” link.
- Choose the “Expression” radio button to indicate that the source value to use is a calculated expression.
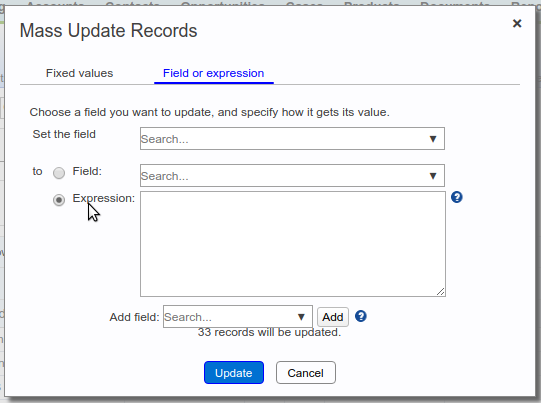
- In the “Expression” box, you can use any JavaScript expression involving the names of the field in the object. Field names are surrounded by
{!and}symbols, but you can imply choose a field from the “Add field” dropdown below and Apsona will add the field name into the box with the correct syntax. In the example below, the expression calculates 1.04 times the unit price.
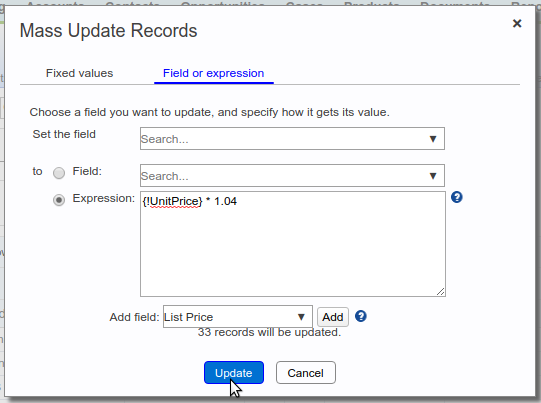
- Click the “Update” button.
Examples 4: Adding to or removing multi-select picklist values #
Suppose you have a multi-select picklist field Activities__c, and for a selected filtered group of contacts, you want to add the values Jogging and Swimming. You can use this formula:
{Activities__c} + ';Jogging;Swimming'
Notice that the semicolons are needed to separate the choices being added to the multi-select field.
Analogously, if you want to remove the choice Watching TV from the field, you might use this formula:
{Activities__c}.toString().replace (/Watching TV/, "")
Some additional examples of mass-update formulas #
{!UnitPrice} * 1.04 |
Multiply the UnitPrice field by 1.04 |
{!MyAddress}.split (/ /)[1] |
Produce the second word in the contents of the MyAddress field. This works by splitting the field’s content into an array of words, and then producing the second word. We use [1] to index to the second word, because Javascript arrays start from index 0. |
{!MyStreetAddress}.replace (/\b\w/g, function (l) { return l.toUpperCase(); }) |
Capitalize the first letter in each word in the MyStreetAddress field, make all the remaining letters lower-case, and return the result. For example, with the string 123 main sTreet, this formula would produce the result 123 Main Street. |
Saving and reusing actions #
Once you have set up a bunch of fields or a formula for updating data, you might want to save that setup as a “mass update action” with a name, so that you can reuse it at a later time without having to set it up all over again. To save the popup contents as a mass update action, click the “Save this action” button that appears after the mass update is complete. Provide a name for the action, and then click the Save button. When you do so, the new action becomes available in the list of saved actions, that you can invoke via “Use saved action”. See the animation below.

A few notes about saving actions:
- If you select an existing action to run, and then try to save the action with the same name, it will overwrite the existing action. If you want to save your changes as a new action, simply give it a different name.
- When saving an action, the name you provide must be different from that of any existing saved action on the same object. (You can have two different actions named the same, but they must be on two different objects.)
- Mass update actions are saved as Apsona Item records. You can examine, manage, export, import and delete them via the Apsona Items interface.