Overview #
The material below assumes that you are familiar with the process for generating Word documents using Apsona’s Document Generator.
Apsona’s Word document generator lets you include:
- static images, such as a company logo or an officer’s signature – images and graphics directly included in your Word template; and
- dynamic images, such as a contact’s profile picture or a QR code, which vary depending on the documents being generated.
Dynamic images are usually produced:
- either via a server somewhere, accessible via a web URL (e.g., a QR code service or bar code service), or
- within your Salesforce org as an Attachment or Document record (in Salesforce Classic) or a File (in the Salesforce Lightning experience).
To produce dynamic images in your generated document, the general steps are these:
- Create one or more image merge fields in the document template, which act as place-holders where the images will appear; and
- Map those fields to the appropriate fields in your Salesforce data, in the merge action builder.
Creating an image merge field #
There are two alternative ways to create a merge field for an image. The first is the preferred way, and the second – the one that uses INCLUDEPICTURE – is the older technique that is retained for backward compatibility.
Method 1: The IMAGE specifier #
With this method, the merge field for an image can be written either with or without a required width specification, as below:
mergeFieldName@IMAGEspecifying a field named mergeFieldName whose contents will be replaced by the image at the corresponding URL; ormergeFieldName@IMAGE,W=nnnspecifying a field named mergeFieldName whose contents will be replaced by the image at the corresponding URL, with the produced image spanningnnnpixels in width.
For example, the screen shot below shows two merge fields, one named Photo, with a requirement that should be 250 pixels wide in the generated document, and a second named Photo2 with no width specification.
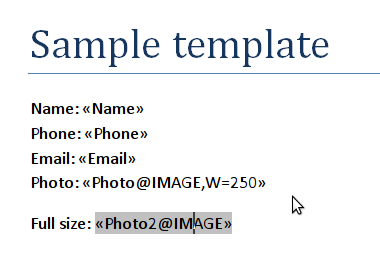
Some things to keep in mind with this method:
- If you leave out the width specification, the image shown in the document will be the same size as the original image at the URL from which it is fetched. But if you provide a width, the height of the produced image will be correspondingly scaled to preserve the original aspect ratio of the image.
- If there is a problem with retrieving the image, e.g., the image is not found on the server, Apsona will show an error message in the generated document in place of the image, indicating the nature of the problem.
Caveat #
The URL-based method will not work for images stored in Salesforce, e.g., as attachments or Salesforce files. If you want to merge images stored in Salesforce, you can use the techniques described further below.
Method 2: the INCLUDEPICTURE tag (not recommended) #
This is the older technique for creating merge fields, and in some ways is less reliable because Word sometimes refuses to update the generated document correctly. In general, we suggest the use of Method 1 above for most use cases.
Ordinarily, to create a merge field, you simply use Insert – Quick parts – Field in Word, or use a macro, as described elsewhere in our documentation. But with the INCLUDEPICTURE method, for an image URL, there are a few additional steps to take. Essentially you will do the following:
- Create a merge field, as usual.
- Open the merge field’s contents and add an INCLUDEPICTURE tag in Word. You do this by
- toggling the field code;
- typing Ctrl-F9 to add an extra pair of braces;
- moving the MERGEFIELD tag into the newly generated braces; and finally
- adding the INCLUDEPICTURE tag.
The process is much easier to understand by watching this demo ![]() .
.
An example report for generating QR codes #
Once you have produced the merge document, you can use a report as data source for the merge. In this example, we’ll use a report that includes a calculated field, shown in the screen shot below.
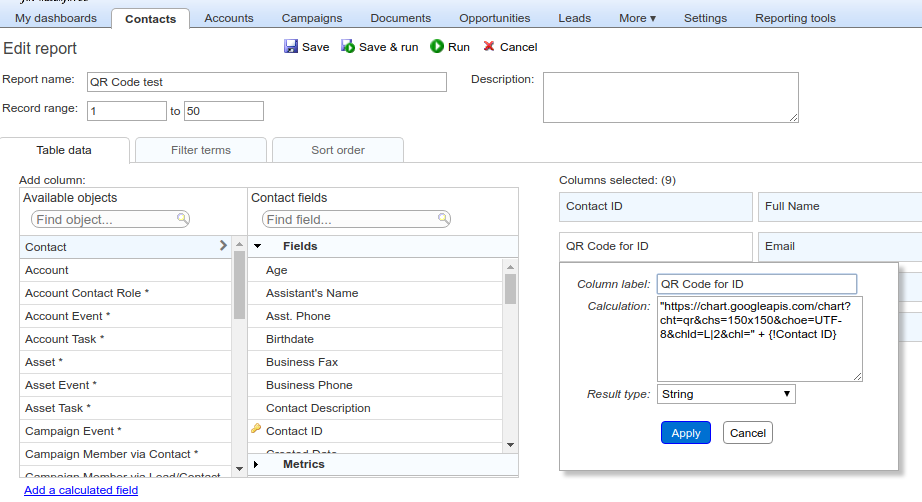
This calculated field produces the URL for the QR code for the record ID of the contact, using the Google Charts QR code generator. Below is the formula it uses:
"https://chart.googleapis.com/chart?cht=qr&chs=150x150&choe=UTF-8&chld=L|2&chl=" + {!Contact ID}
Note that the formula relies on the Contact ID field in the report. Also note the parameter chs=150x150 which specifies the size of the generated QR code in pixels. If you want to change it to, say, 100×100, you would instead use chs=100x100.
Handling images stored in Salesforce #
Apsona’s Document Generator can handle dynamic images stored in either the Document or Attachment object in Salesforce Classic, or as a File attachment in Salesforce Lightning. The key feature here is that for these three use cases (Document, Attachment or File), you can map the image merge field in your document template directly to a field that contains the record ID of a the attachment record to be included (i.e., no need for a field containing a URL). Note: currently, images stored in rich text fields in Salesforce are unsupported.
Images in the Document object #
If your image is stored in the Document object, you can use the following process:
- Create an Apsona report or view that produces the Document ID along with the other data you wish to merge into the generated document. For example, if you wanted to generate documents from the Contact object, one way to do this is to create a custom field on the Contact object, and have it be populated with the document ID of the image you want to produce for each Contact.
- You can then map that custom field directly to the image merge field.
Images in the Attachment object #
With images in the Attachment object, the usual setup is that each record in your main object (e.g., Contact) has an associated Attachment record that contains the image data. To handle this case, we suggest the following process. We assume here that you are familiar with generating documents with sublists.
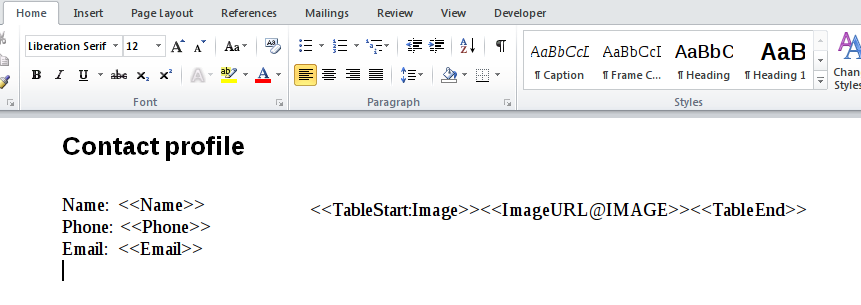
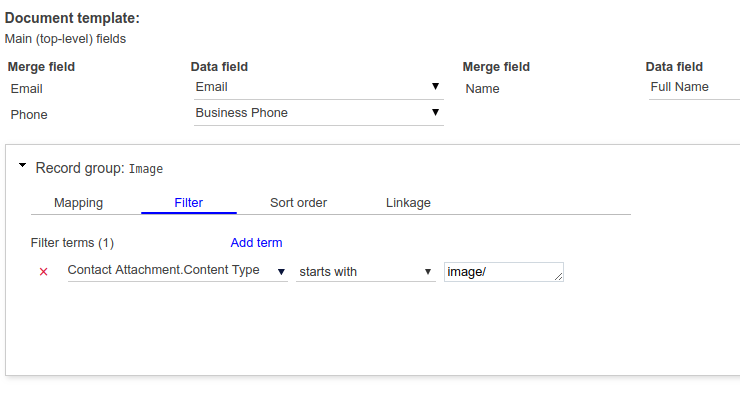
- In the section of your document template where the image should appear, create a TableStart-TableEnd pair that refers to just the image to be attached, analogous to the screen shot below. There is only one merge field in the record group, and that is the image merge field.
- Map the data source for the Image record group to the Contact Attachment object (or, if you are generating documents for some other object
MyCustomObject, use theMy Custom Object Attachmentobject).
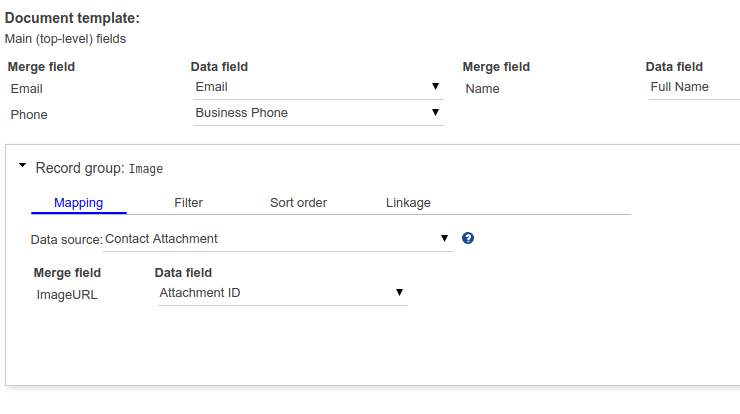
In this record group:- Map the image merge field in the template to the Attachment ID field, as in the above screen shot.
- Set up a filter so that it extracts just the image attachments you want. In the example below, we have just one filter term that limits the attachments to images, but you might need tighter filters (e.g., that the attachment name matches, say,
Profile Picture– according to the conventions in your org).
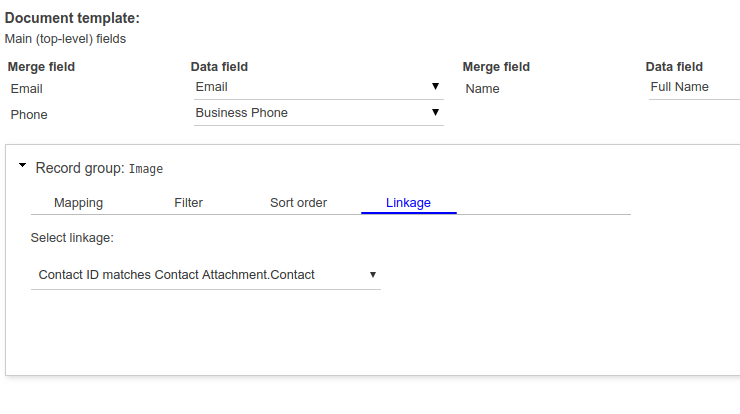
- Set up the linkage so that the object IDs match. In our example, we set up the Contact IDs to match, as in the screen shot below.
Images as Files in Salesforce Lightning #
Salesforce Classic’s Attachment data model is very simple. But the Lightning data model for files is more complex, and involves three different objects: ContentDocument, ContentDocumentLink and ContentVersion. This makes it significantly harder to get at the attachment’s content. To simplify this process, Apsona’s Document Generator includes a pseudo-object called Apsona Lightning Attachment Surrogate. Apsona makes this object available automatically for all profiles. This is not a real object in Salesforce, but rather a “view” that maps to the correct fields within the three Salesforce native objects mentioned above. (Specifically, it maps to the data corresponding to the latest version of each file.) So the steps in Lightning are similar to the ones for the Attachment object in Classic:
- Create the template with the Image table, as described above for the Attachment object.
- Map the related list to the Apsona Lightning Attachment Surrogate object.
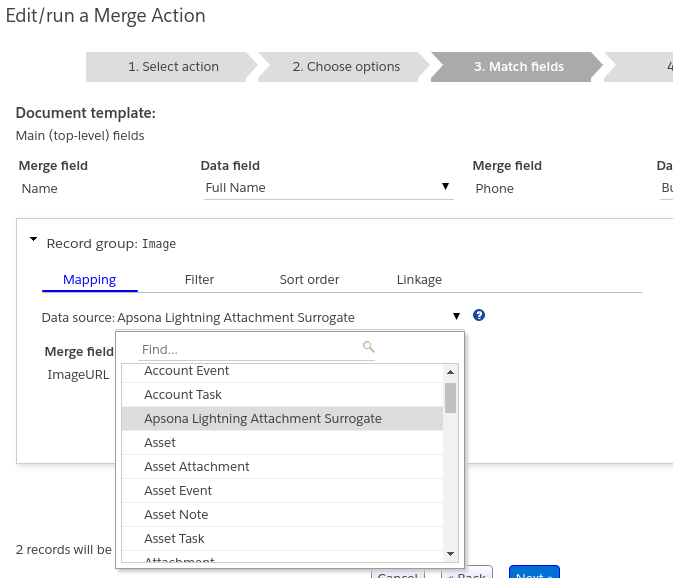
- Map the Id field of the object to the image merge field.

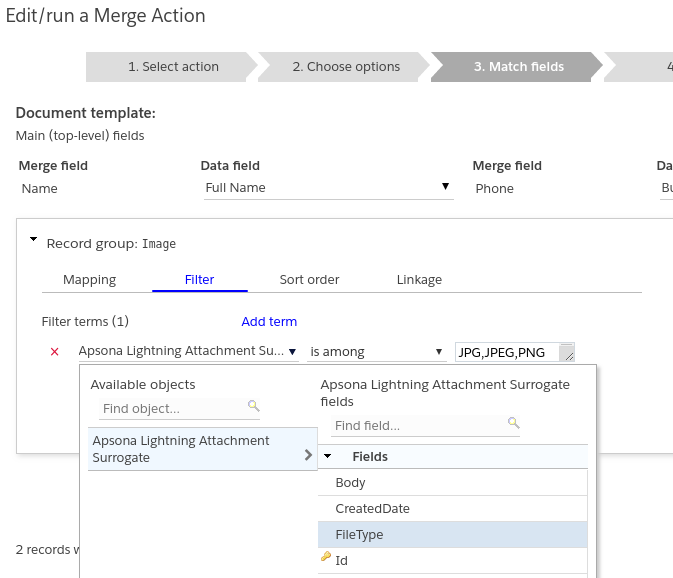
- Set up a filter that extracts the necessary attached image files. The screen shot below shows a restriction by file type, but you might want to add more filter terms so that you restrict it to just the image files you want (in case your Salesforce data contains lots of image files attached to your records).
- Finally, set up the linkage so that the record ID of the main object (Contact, in this example) matches the ParentId field of the Apsona Lightning Attachment Surrogate object.
Printing the generated document #
A key advantage of Method 1 above is that the images are included as part of the generated document, with no additional steps needed on your part. You can also generate PDF documents using the technique of Method 1.
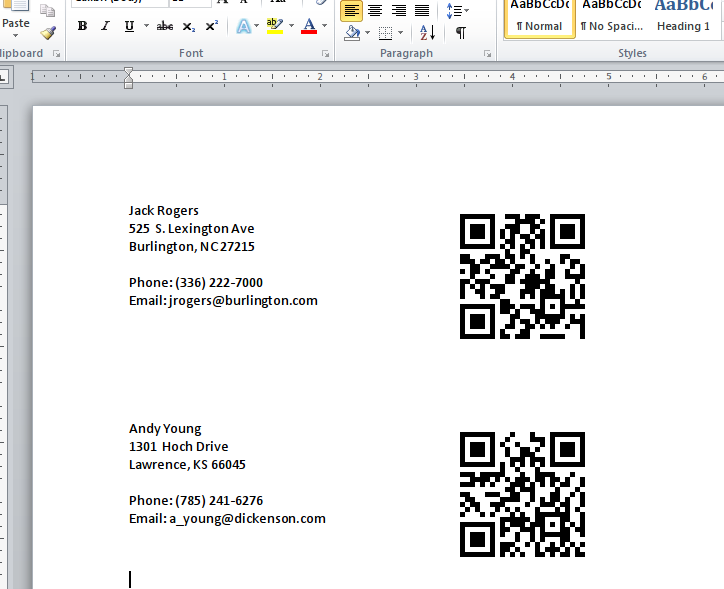
But method 2 (the older INCLUDEPICTURE method) has some disadvantages in this regard. Once you have generated the merged document and downloaded it, you will need to tell Word to update all the images in the document before it can be printed. You can do this by pressing Ctrl-A (select all), followed by F9 (update all fields). You will then see a ready-to-print document, part of which might look like the screen shot below.
If you like, you can download the .docx template that produced this screen shot.
Limitations #
- PDF generation with dynamic images is supported only with documents that use Method 1 above.
- Including dynamic images in emailed documents is supported only with Method 1 above.