Apsona’s import facility can be used to import data records into multiple related objects with just a single CSV file. Here is a detailed example showing how to do this. This example shows importing Account and Contact records from one CSV file, but you can use a similar procedure to import into any pair of linked tables. Suppose we have a CSV file containing contact information, like this:
| First name | Last name | Phone | Company | Company City | |
|---|---|---|---|---|---|
| Joseph | Stangerson | 902 223 3344 | js@hope.com | Hope Corp | Corinth |
| Enoch | Drebber | 902 223 3344 | ed@hope.com | Hope Corp | Corinth |
| Mary | Morstan | 816 333 4567 | mary@s4.com | Sign Four Inc | London |
| Thaddeus | Sholto | 816 333 4568 | tad@s4.com | Sign Four Inc | London |
| James | Moriarty | 666 645 4555 | jim@mori.rty | Advanced Concepts | Reichenbach |
| Ronald | Adair | 666 645 4565 | ron@mori.rty | Advanced Concepts | Reichenbach |
And we wish to create both Account and Contact records from this single data set. We want the distinct company names and addresses to end up as records in the Account object, and we want the corresponding contact records to be linked to the account records. In the above example, we want three Account records (for the three distinct company names), each linked to two contact records.
Outline of steps #
- Import the CSV data into the Account object, rejecting duplicates. During this step:
- Map the account-related columns in your CSV data to corresponding Account fields
- Leave the contact-related columns unmapped.
- This will create the three account records. It will also produce an output CSV data file containing all of the data in the original file, but annotated with the record IDs of the three new account records.
- Use the output CSV data file from the above step to import into the Contact object. During this step:
- map the account ID produced in the output of the Account import
- Omit the mappings for the account-related fields, but map the contact-related fields to the corresponding salesforce fields.
This step will produce six contact records, linked to the accounts as desired.
Detailed description #
- Navigate to the Accounts tab and click Tools – Import/update.
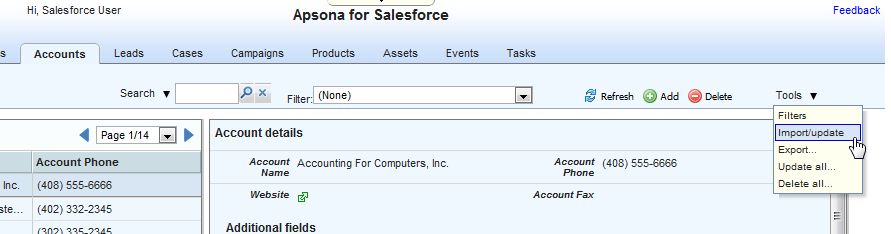
- The import wizard appears. Paste the CSV data into the box. (You can specify a file name for upload instead, if you choose.) Then click the “Next” button at top right.
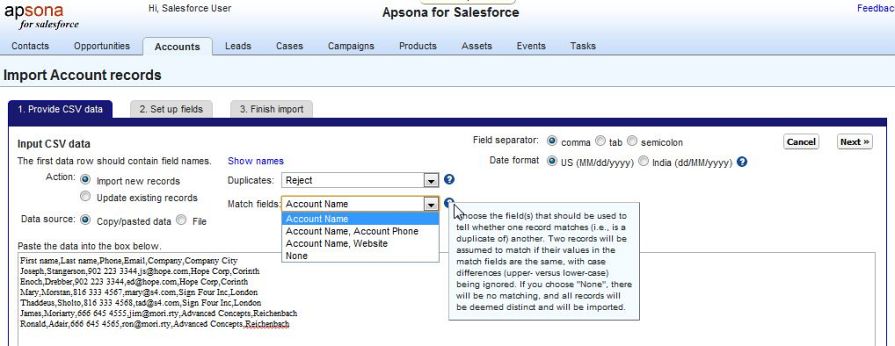
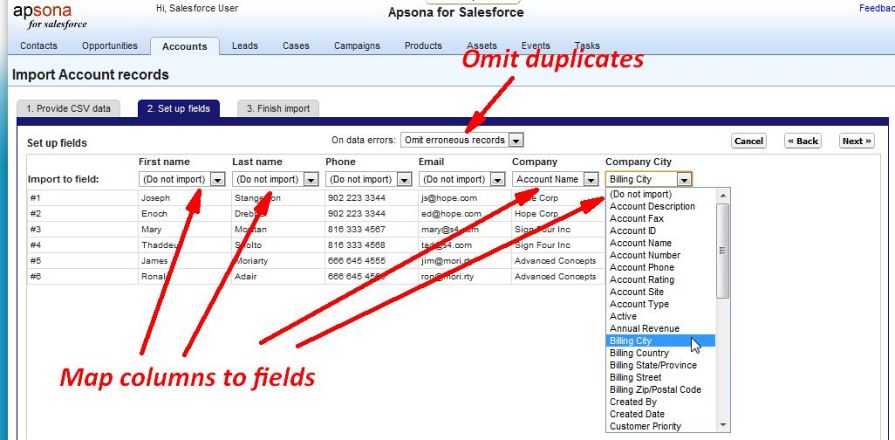
- The second step of the import wizard appears. In this step:
- Map the columns of the CSV data to fields in the Account object.
- Match the Account-specific columns (Company name and Company City) to the corresponding salesforce fields, and leave the Contact-specific columns set to “Do not import”.
- Set the “On data errors” option to “Omit erroneous records” so that duplicates are rejected.
- Click the “Next” button at top right.
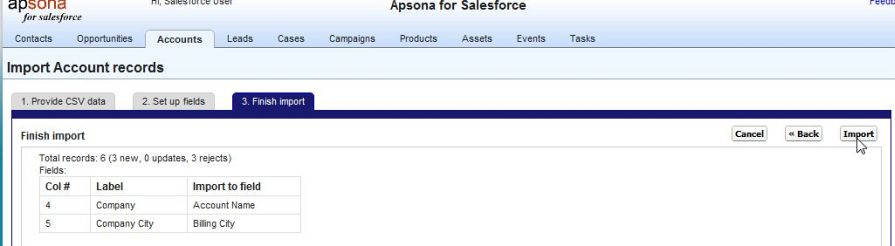
- The third step appears, just before the actual import happens. This step shows the mappings you have set up, and the number of records that will be imported. Click the “Import” button at top right.
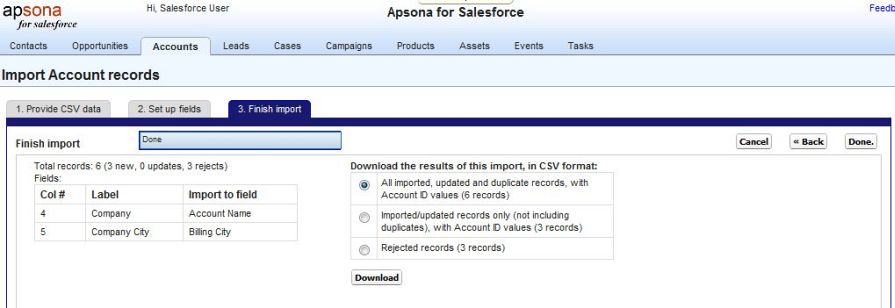
- In a few moments the import is complete, and the “Download results” panel appears.
- Select the “All imported, updated and duplicate records” radio button and click the “download” button. This will download all the data records, with Account ID values attached.
- Click the Done button at top right.
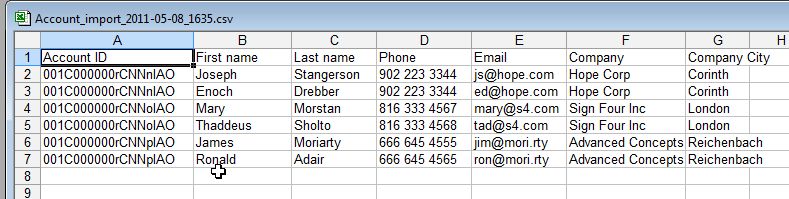
- The downloaded CSV data looks like this. Notice that the account ID values are automatically propagated to all the “duplicate account” records. This will enable us to import the Contact records correctly.
- Now use this CSV data to import into the Contact table. As before, click Tools – Import/update in the Contacts tab.

- In the first step of the import wizard, provide as CSV data the downloaded output from the Account import. Click the “Next” button at top right.
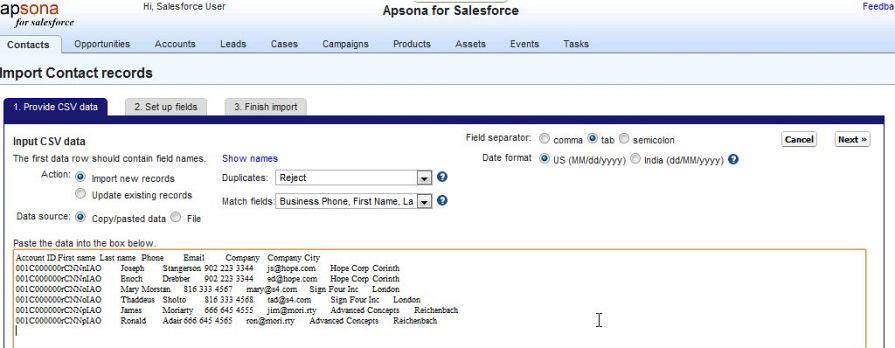
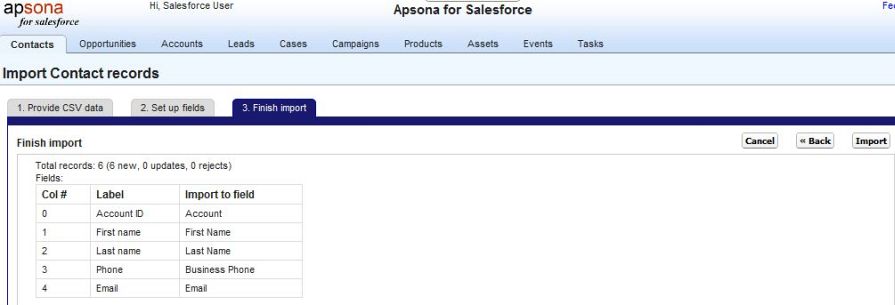
- In the next step, map the contact columns in the data to corresponding fields in salesforce, and map the Account ID field to the corresponding column. Leave the Account-related fields unmapped. Click the “Next” button at top right.

- In the final step of the import process, click “Import”, and then “Done”.
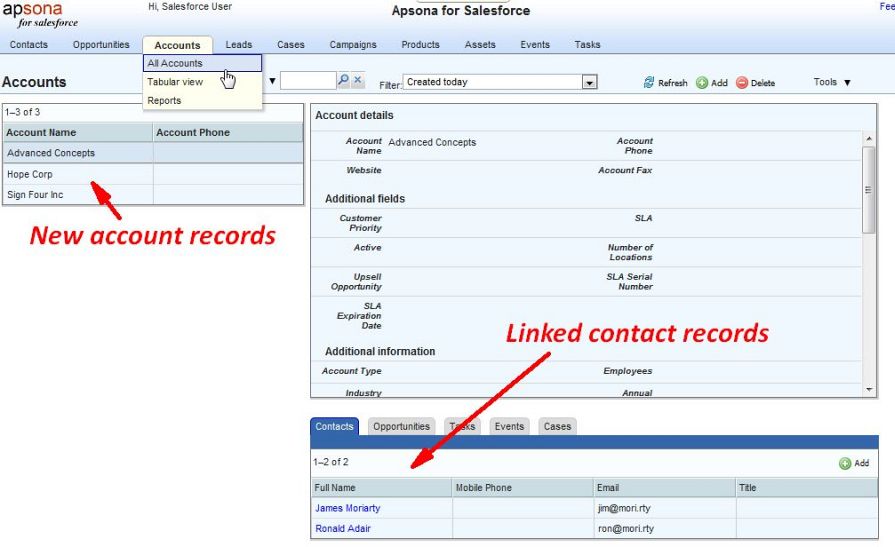
- We’re done. If you now navigate to the “All Accounts” menu item under the Accounts tab, you will see the three new account records, and the corresponding contact records in the child tab.
Example: De-duplicating across Leads and Contacts #
As another example use case, suppose you have a CSV data set that you wish to import as lead records into your Lead object, but you want to ensure that the imported leads are not already in your Contacts object. Suppose further that your criterion for a lead to already be a contact is that there is a record in the Contact object with the same first name, last name and email address. You can then proceed as follows.
- Use your CSV data as input to a Contact import, as follows:
- Choose “Import new records” as the operation, and “Update existing” as the duplicate handling action.

- In Step 2 of the import wizard, select “Omit erroneous records” as the choice for “On data errors.”

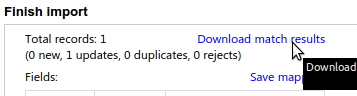
- In Step 3, instead of finishing the import, simply download the match results.
- Choose “Import new records” as the operation, and “Update existing” as the duplicate handling action.
- This download now gives you a CSV file containing a record ID column, and each record that is already in your Contacts list will have a matching contact ID in that column. You can now use Excel (or other spreadsheet program) to sort that CSV file on this column and remove all rows that include a value in that column.
- Finally, import the result of this removal into your Lead object in the usual way.