Overview #
This article is about features of the Apsona Document Generator add-on, so it assumes that you are familiar with that add-on and its concepts, and with its Word and PDF specifics.
The Document Generator add-on includes the built-in ability to generate barcodes and QR codes from Salesforce data, or from calculations in Apsona reports. To display a value as a barcode in a document, you need only specify the BARCODE format specifier for the field where the barcode should appear, as discussed below. Similarly, to display a QR code, just use the QRCODE specifier.
The barcode and QR code generation happens entirely within the browser, with no external services or servers involved. This means that
- The data to be barcoded or QR-coded never leaves your Salesforce org, thus ensuring better security; and
- The generation process is as much as 10x faster, because there is no network latency involved.
You can generate barcodes and QR codes within regular docx and pdf documents, or within address labels.
Generating barcodes #
To generate a barcode for a data value, you simply create a merge field in your template, annotate it with the @BARCODE format, and map that field to the data value. The data value can come from any of the usual data sources that the add-on supports. It can be a field on a Salesforce object or a metric or calculated column in an Apsona report or multi-step report.
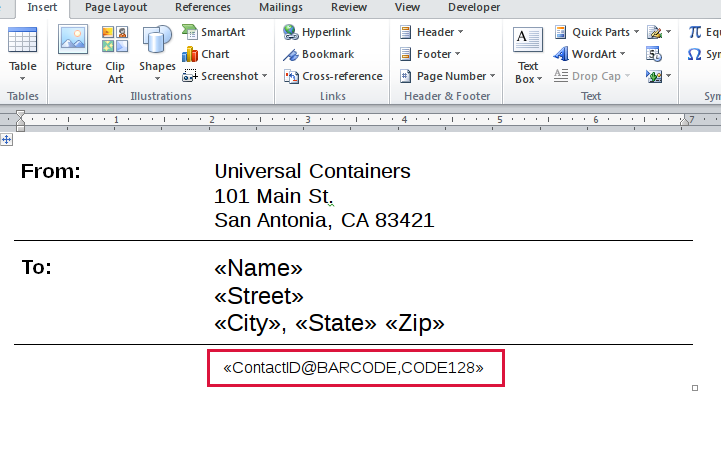
Below is an example Word template that uses a barcode format specifier. Here we want to generate shipping labels, where each label contains a barcode for the Contact ID of the contact for whom we want to generate shipping label. So we have set up a merge field named ContactID, with a format specifier requiring a barcode in code128 font. If you like, you can download this template to examine it.
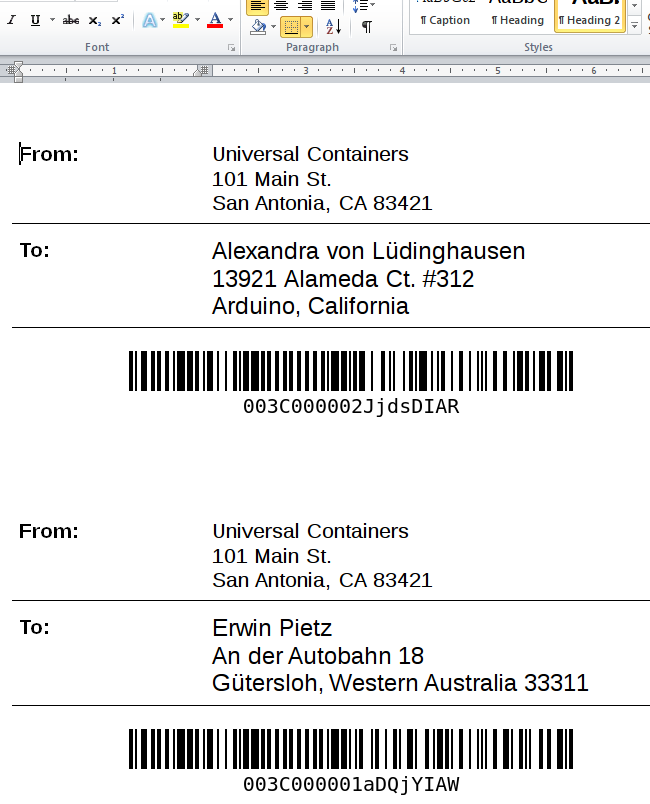
The screenshot below illustrates the result produced by mapping the template fields to the appropriate Salesforce fields.
Format specifier #
The format specifier should contain the word BARCODE (in uppercase), optionally followed by a comma and the desired barcode font. Below are two examples.
«ContactID@BARCODE» |
Produce a barcode containing whatever value is mapped to the ContactID field. Since no barcode font is specified, the result is in the default CODE128 barcode font. |
«Order Number@BARCODE,UPC» |
Produce a barcode containing whatever value is mapped to the Order Number field, using the UPC barcode font. |
Additional options #
Alongside the barcode font, you can also optionally specify
- the
heightoption to control the height of the produced barcode in pixels - the
nocaptionoption that suppresses the caption underneath the barcode (which normally contains the actual character data in the barcode).
These options are separated by commas. Below are some examples showing how to use these options.
-
The merge field specification
«ContactID@BARCODE,CODE39,height=30»
produces the barcode below.

-
The merge field specification
«ContactID@BARCODE,CODE39,height=30,nocaption»
produces the barcode below.

Supported characters #
The generated barcode depends, of course, on the barcode font you use. Each font has its own set of supported characters. If you use a font that does not support the characters for which you want a barcode, you will see an error message in the generated document.
Technical information #
The barcode generation relies on the JsBarcode library. It happens entirely within the browser, with no third-party servers involved. This speeds up the generation process significantly. It also makes the entire process secure, since the data is never transmitted outside the connection between your Salesforce org and your browser.
Supported barcode fonts #
The current Document Generator implementation supports the following fonts:
Our sincere thanks to the developers of JSBarCode.
Generating QR codes #
The process for generating QR codes is quite similar to that for barcodes, You need only create a merge field in your document, annotate it with the @QRCODE format, and map the merge field to the data field whose value needs the QR code. You can optionally add a width parameter w to specify the width of the generated QR code in pixels. Here are two examples:
«Email@QRCODE» |
Produces the QR code for whatever value is mapped to the merge field named Email, with the default width of 128 pixels. |
«Contact_URL@QRCODE,w=250» |
Produces the QR code for whatever value is mapped to the merge field named Contact_URL, with a width of 250 pixels. |
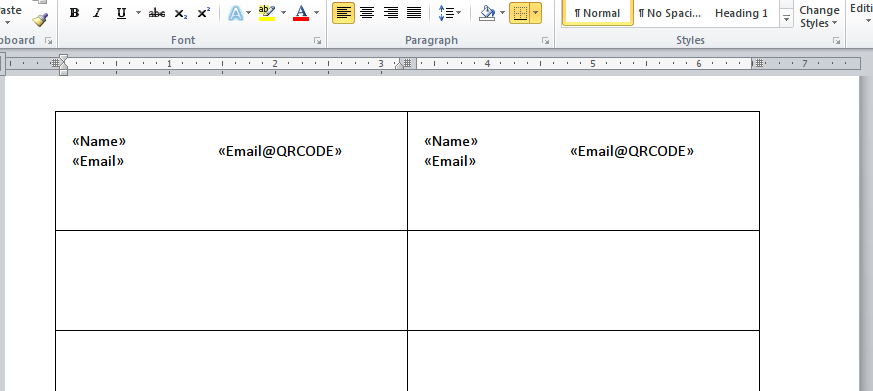
Below is a screenshot of part of an address label template that produces QR codes.
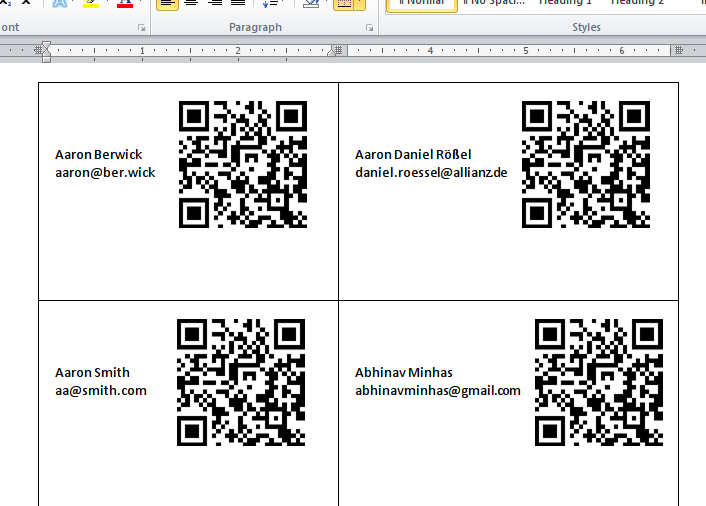
When used with some sample data, the template produces the output below.


