Required access rights #
To access Apsona, a profile must have access to three things: the Apsona tab, the Apsona Visualforce page and read-write access to the Apsona Items object and all its fields. Therefore, you can manually add these rights to all the profiles to which you want to provide access.
Problem: User cannot see the Apsona tab #
The administrator must ensure that each user who needs access to the Apsona:
- has an Apsona license assigned to her (which can be done by clicking Setup – Installed Packages – Manage Licenses);
- has access to the Apsona Item custom object;
- has the ApsonaForSalesforce VisualForce page visible to her profile (which can be done by editing the user’s profile and adding the page to it); and
- has access to the Apsona tab, if the user needs access to the Apsona UI.
An administrator can set up these items by editing the user’s profile in Salesforce. Users who do not need direct access to the Apsona UI (e.g., those who use only Apsona-driven buttons or links in Salesforce detail pages or home pages) need only have access to items 1, 2 and 3 above.
Problem: Users cannot access Apsona #
If you have installed Apsona for Salesforce with access to admins only (as in the screen shot below), you might run into problems when trying to provide Apsona access for users with custom profiles.
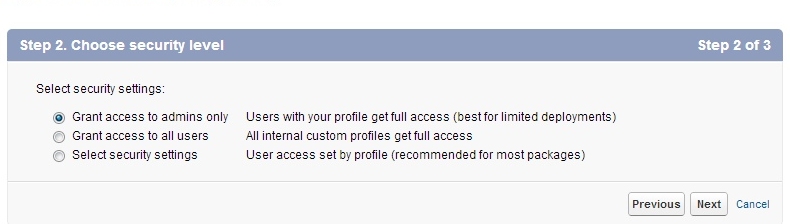
In such situations, your users might see a message saying that they are “Unable to access Apsona data” as in one of the screen shots below.


Fixing the problem: Enterprise Edition and up #
To fix this problem, you will need to update the user profile to access the fields.
- Navigate to Setup – Installed Packages. Click the “Manage Licenses” link next to Apsona for Salesforce, and add the user to the license.
- Check if the user profile has the Apsona tab to Default On.
- If you are using Salesforce Classic:
- Ensure that you have “Enhanced profiles” enabled in your org, by navigating to Setup – Customize – App Setup – User Interface, and checking the “Enable Enhanced Profile User Interface” checkbox at the bottom of the page.
- Navigate to Setup – Manage Users – User Profiles, and click the user profile for which you want to enable access.
- In the Apps panel, click Object Settings.
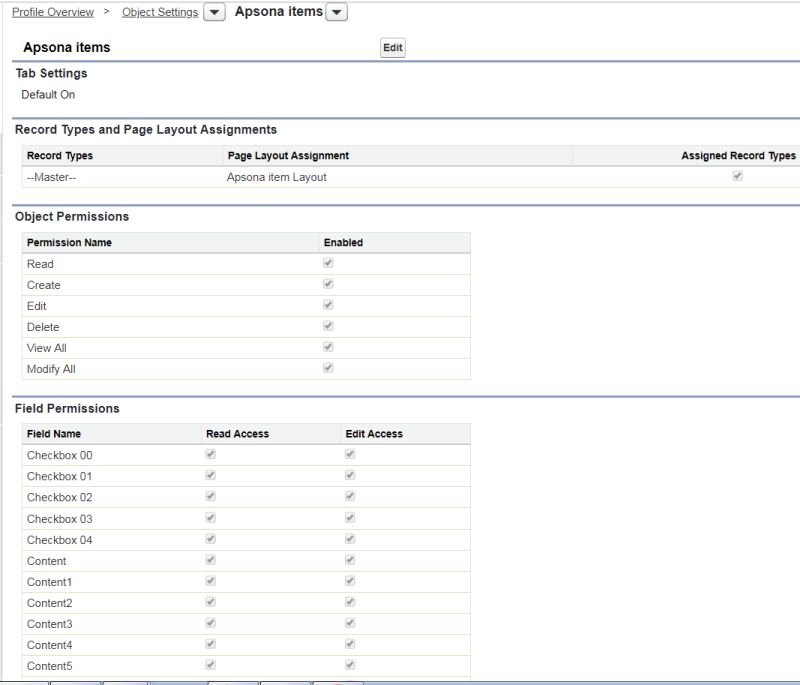
- In the All Objects panel, click Apsona Items.
- Make sure that all checkboxes in the Object Permissions section are checked. Also make sure that all the fields except Created By and Last Modified By have Read and Edit access. You might need to click the Edit button at the top of the page and edit the profile to enable all of these permissions. (Quick tip – click on the edit check box as this will automatically check the Read permission and it saves time.)
If you are using the Lightning Experience:
- Click Setup – Profiles – your user profile
- Click “Object Settings” under “Apps”
- Click on “Apsona items”
- Click the Edit button at the top
- Make sure that all checkboxes in the Object Permissions section are checked. Also make sure that all the fields except Created By and Last Modified By have Read and Edit access.
- Ensure that the user profile has access to the Apsona Visualforce page, as follows.
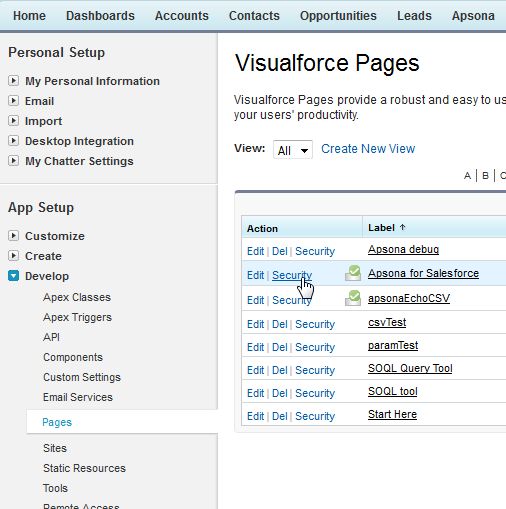
- Click Setup – Develop – Pages
- Click the “security” link next to the page.
- Add the user’s profile to the list of enabled profiles
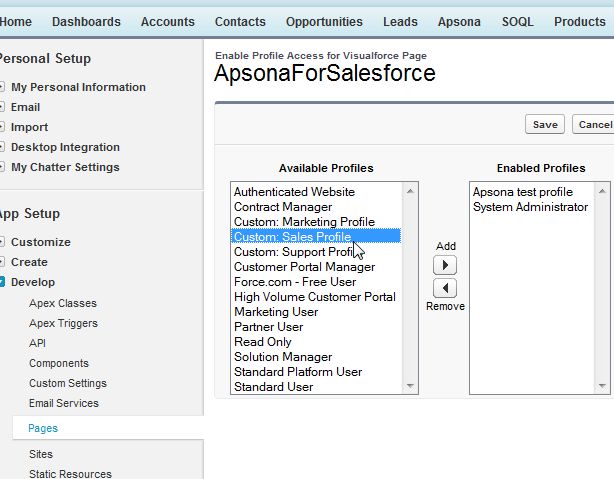
- Click Save.
Fixing the problem: Group and Professional Editions #
In the Group and Professional Editions, field access is governed not by profile but by page layout. So please take the following steps:
- Navigate to Setup – App Setup – Create – Objects. (In the newer UI, navigate to Setup – Build – Create – Objects.)
- Click the Apsona Item object.
- Scroll down to the Page Layouts section, and click the Edit link next to Apsona Item Layout.
- Drag each field in the Fields panel down into the detail area. You will have to do this one field at a time. The idea is to make sure that all the fields of the Apsona Item object are visible to your users.
- Save the layout.